Sunday, November 30, 2008

Wet Weekend

Thanksgiving break was very wet. Did not get to do much until Sunday afternoon.

Saturday, I did make some racks for the kayaks. The front rack is a little wide, but it makes sliding the kayak toward the back a lot easier. Once I pick Sally's kayak up from White Sands, I will either add the second rack on top, or I may see if it will fit on the same rack.


In the past few weeks, my shop had turned into train wreck.


This is the top of the laundry room shelf we had in our apartment. We did not really need it in our house. It has been taking up room in the shop since it got there.


So, I decided to cut it in half.


Now, I have two semi-decent wall shelves.


All afternoon, Old Man Winter was announcing his arrival.


French food and wine are good - French cleats are great.


This is my shop buddy. I haven't confirmed this 100%, but I've got a feeling he only really comes around when I put out a can of sardines.


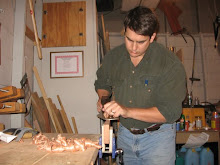
My Dad had picked up a Stanley/Bailey #6 some time back. Since it looks like flattening my #7 jointer is going to take more than a couple of hours, he loaned his #6 to me. It feels good. It makes some nice curls.


I got my shop somewhat organized. While it looks really out-of-sorts here, there are actually aisles of racks. I'm not sure how long this arrangement will last.


I've got plenty of room around the bench now.

Monday, November 24, 2008

Plane duty

This is a #7 Jointer plane I bought from a fellow when I ran the ad in the Market Bulletin about old planes. He had bought a lot of them at a school that was selling their old shop equipment. It is pretty rough looking, but it did not have much rust, and appeared not to have any pitting.


I bought this bench plane from him also. I am going to make a convex blade for it and make it a scrub plane. In theory, I could just swap a convex blade in and out of my bench plane when needed, but I have the feeling that I am going to have to open up the throat on it a little with a file to take the bigger shavings.


This is the bottom of the jointer. You can see waves in the sole perpendicular to the sides.


After lapping it on some 100 grit on a piece of float glass, you can really see the waves. I am not sure where these came from. They are pretty evenly spaced, so they must be milling marks left over from the original manufacture. If so, I can understand why people may have hated shop class.


I have lapped a number of blades and other things on my only sheet of wet/dry 100 grit. I'll need to pick up more. But, until then, I used a coarse DMT stone.


After quite some time, the sole is starting to look like this. There are a number of scratches in the sole. Additionally, a pit popped up right on the front of the throat. Also, on the leading side of the throat, there is a little dip. It it triangular shaped and can be seen in the picture. I am not sure how that got worn down. But there are few scratches in the sole too, so I figure this little fellow had a pretty rough life.


This photo was taken too close. But, this is the sole of the Stanley #4 I got off the clearance rack at the Woodcraft in Virginia. The sole came pretty flat. The photo was taken after I had done a bit of lapping on it. You can see how the corners and edges, especially on the leading edge, are starting to mill down. The darker gray are the milling marks leftover from the manufacturing process. These are quite deep.


Lots and lots of this will eventually produce a mirror finish sole.

Saturday, November 22, 2008

Chicken & Brisket - Smokin Saturday

No, chicken & brisket isn't a Nabisco cracker. What it is is, is a good Saturday diversion.

Take a 4 lb brisket and score the fat cap in a cross-hatch pattern


Brine in a salt and sugar solution for a couple of hours


Rub down with a dry rub - with sugar, of course


Putting the coal to Ole 382


Mr. Brisket gets a lean-to


Meanwhile...back in the lab...Mrs. Leghorn is getting a chimichurri rub.


"Hello, Mr. Brisket."
"Why, hello, Mrs. Leghorn..."


A morning and most of an afternoon later. Note the pink "smoke ring". The smoke doesn't actually turn the meat pink. The ring is the result of the meat being cooked at a low temp in a closed environment. The fire emits gasses that dissolve in the moisture on the surface of the meat. New compounds are created which are similar to the nitrates that are added to deli meat to keep them pink.


White meat and clear juice - but notice the charred exteriors. According to one website, a two hour BBQ can release as many dioxins into your food as 220,000 cigarettes. Okay. So, according to this information, there are about 660,000 cigarettes worth of dioxins in this food. But, it was still cheaper than sending the pair to the Flora-Bama for the weekend.

Friday, November 21, 2008

Eddie Carl

For the most part, I try to consciously appreciate and protect my five major senses. I wear ear protection when running the planer or shooting repetitively. I am an advocate of yellow safety glasses at all times. One need only to try and find my belt buckle to know that I keep my tongue on a strict exercise regimen. I am getting better about wearing gloves.

The nose is what has thrown me for a loop this week. Most people smell bacon frying and get hungry. While blatant and a little trite, that is what the Entorhinal Cortex does. I’ll call it Eddie Carl. Eddie Carl links memories with smells. Your nose alone is capable of ruining what may have been an otherwise pleasant airplane flight. But, it is Eddie Carl that lets you know your car is overheating. Or,Eddie Carl will pass by a vase and make you think you are in a funeral home.

Well, Eddie Carl and the rest of the brain talk, and they know what is what.

Earlier this week, I was going to have a late afternoon piece of fruit. So, I went back to the kitchen and grabbed a couple paper towels and a cup of water and washed my hands. I noticed the soap dispenser was different, but that was about it. I went back to my office and had my fruit. It was an orange, so I needed to wash my hands again. This time, I noticed that the soap dispenser had a bee on it.

Eddie Carl went to work. Before I knew it, I had lost interest in whatever it was I had been working on. I began looking at the Fine Woodworking archives. I ran across Thomas Jefferson’s lap desk. Instead of being totally intimidated by it, which is my usual response, I was invigorated by the thought of working on it. Intoxicated by the thought of this project, I drunk dialed Shep Miers for pointers and ordered a cheap copy of Declaration of Independence Desk: Relic of Revolution from abebooks.

On the way home from work, as I ran the back of my hand across my nose, it dawned on me. The new soap at work smelled just like Liberon paste wax. I was doomed the second I washed my hands in the kitchen. Once ole Eddie Carl made the connection, he started talking to other parts of my brain, and before I knew it, I was neck deep in planning to make a Thomas Jefferson lap desk.

I reckon the moral of the story is this - don't trust Eddie Carl.


Sunday, November 2, 2008

The Gun Rack

I have been planning to build a portable/field gun rack for some time. (Google Images - "Admiral Baker Gun Rack"). I have been collecting hardware for a while. I built a MDF mock-up a few months ago. The original plan was that the entire rack would break down into long narrow components which would be lashed together with a couple strips of leather. I was going to attach each piece with low-profile flush mounts. Good intentions pave the road, etc. Suffice it to say that a sho'nuff field model that would completely break down is going to need some additional engineering.

The wood is South American/bastard mahogany that came from Pickens Hardwood in Clinton, Miss. I don't remember how many board feet I bought, but most of it was 4/4 in 6" - 8" widths about 6' long. I bought one piece of 8/4 for the legs. The lumber was edged at the mill and planed at Pickens. I also ran it through the planer in Brookhaven and broke is down into approximately 3' lengths. Technically, I never flattened any of the boards, but they were in pretty good shape.

I had previously resigned myself to the fact that I would not get around to building the gun rack before the L.E.G. Quail Hunt this year. But, last night, I took the plunge and started making sawdust.

I started ripping the lumber with a hand saw. I quickly realized that I needed to invite a motor to the party.

Since my table saw is really only good for cutting MDF or plywood, I used a straight edge and Skilsaw to rip the boards.


My first vehicle was a Jeep Cherokee. Today, at the bench, I realized why I loved to drive that truck so much, and why I think I am going to like using planes. It took a helluva lot of work to get/keep it in the condition so it was able to do what it was supposed to do. But, when it did, it was a ton of fun.


I am going to find out if it is possible to wear out a card scraper.


I got ready to cut the boards to final length. I did a trial run on my chop saw and got some awful tearout. The blade is in decent shape, so I figured it was due to the fact that the base/fence opening was too large. Now, most people would have viewed such necessity as a prime opportunity to build an auxiliary fence/base with a zero clearance slot. I tooke the lazy approach. I reached for the handsaw.

But, I thought I may still have a problem with tearout/damage, and since all sides of the board would be exposed, I wanted to mitigate any damage as much as possible. I recently read an article on sawing in Woodworking Magazine by Christopher Schwarz. He had an interesting approach to sawcuts that he attributed to Robert Wearing.

Schwarz divides saw cuts into Third, Second, and First Class cuts. Third Class cuts are for breaking down stock or other cuts that will later be refined. Second and First Class cuts both wind up in joinery, but a Second Class cut is one that is hidden, e.g. the cheeks of a tenon. First Class cuts are those that wind up visible in the final product, e.g. the shoulders of a tenon.

Schwarz's solution for making a crisp First Class cut is as follows:


After marking a line with a marking knife, place a chisel in the mark (bevel out). Give the chisel a light tap.


Next, pare away a wedge of wood from the waste side of the cut. Your cut is made. All that remains is to use the saw to finish the cut. So, by starting with the chisels, you eliminate the chance of the saw gnawing up the face of your work.


Another very handy tip I got from Schwarz's sawing article is illustrated below. Although keeing the Z axis under control in sawing is pretty natural, keeping the X and Y axis with the program can be a little more challenging. The solution is keeping your saw shiny. As a result, a properly aligned saw with let you know if you're square. As you can see in the picture below, the reflection of the board in the saw is aligned perfectly with the board itself.

Saturday, November 1, 2008

The Pheasant Cup Base

I have finally gotten around to making a base for the L.E.G. Pheasant cup. The cup has been in the top of the closet since last year.

I picked up a piece of turning stock from Pickens hardwood for the base. It is a piece of Mequite. This is my first experience with a card scraper (bottom right of block) and I can already tell it is going to be one of my favorite tools.


I did some lapping on the blade from my new spokeshave.


As the blue lines indicate, the blade was not very flat when it left the factory.


The is a nice view of the trophy base. For the finish, I think I want to go for a color like the waxed portion of the block - the two bands on the ends.

The Chair

It has been a while since I have worked in my shop. Today the weather was perfect. One of the dining room chairs needed to be repaired.


First, I had to drill out the old dowels with a bit 1/16 to 1/8 smaller than the dowel.


Then, I used a bit the size of the dowel to dislodge leftover old glue and dowel.


After getting into the chair a bit, I realized most of the joints could stand to be reworked. Lots of broken and loose dowels


This is the dry fit


Final glue up